Monday, April 11, 2011

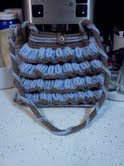
Brown and Blue Ruffle Purse (crochet)

This purse is finally finished!! It was a two-day project, which normally I wouldn't take on as quickly...but I thought I'd be done with it sooner than I was. You know, life happens and you have to take wee breaks :) For instructions on how to make the purse *handle* please see the bottom of this post!

Showing the inside and the button enclosure ^^

The bottom has a blue detailing line^^

Side profile view also with more blue detailing lines ^
^

And check out that handle!! I think that is what took the longest. And the ruffles. If you do any crocheting, and are especially familiar with amigurumi and how you start the body pieces for toys... the handle is basically like that:

You start with 2 chains, then 6 sc into the 2nd ch from hook. For the rest of it, you simply put 1 sc into the BACKloop only of each sc until it is as long as you wish. (Do not join at each round, it is worked in a continuous spiral). It makes it rather "boingy/springy" which is great for purse handles. As for the blue swirl that goes all around it, you simply join in your blue (or whatever color) yarn to any free loop at one end....then go up one row and over to the left one stitch and slip stitch. Rep all the way to the other end. :)


Saturday, April 9, 2011

Free pattern for to-go cup cozy (crochet)


This is only the 2nd or 3rd thing I've tried to write a crochet tutorial for...and I apologize for not having other pictures on this. I actually had taken 8 or 9 of them but blogspot is being a pain and not letting me upload them at the moment. *boo* Anyway, here is the pattern, please let me know if there are any issues with it. I'd love to see your finished ones, too, if you want to share!

To-Go Cup Cozy

you will need: G hook, worsted weight yarn in 2 colors (A and B), tapestry needle for weaving in ends

With A: ch 34, turn.
R01: sc in 2nd ch from hook and across to end. switch to B. Ch 1, turn.
R02: sc across. switch to A. ch 1, turn.
R03: sc across. ch 1, turn.
R04: sc across. ch 1, turn.
R05: sc across. ch 3, turn.
R06: sk first st, dc into next, dc into the skipped space. *sk next st, dc into next, dc into previous skipped* rep
across. ch 1, turn. <---(you are making criss-crosses for this row, basically)
R07: sc across. ch 1, turn.
R08: sc across. ch 1, turn.
R09: sc across. switch to B. ch 1, turn.
R10: sc across. switch to A. ch 1, turn.
R11: sc across. On last st, sc 1 more and then working down the side, sc across to end. This will give a neater
appearance. Fasten off, leaving an 18" tail for sewing. Overlap the side with the SCs to the other side to form the cozy and stitch neatly through both layers. Weave in all loose ends.

This pattern is free for your use and not for you to sell or pass off as your own. Please give credit if you make/sell items from this pattern. Thank you!

Thursday, April 7, 2011

Amigurumi ducky, bunny and also a Tinkerbell cake ;) :D


Busy, busy, busy!!!! That describes me these days :D Trying to get as much stuff done as possible for the up-coming craft fair and also doing cakes for friends while I'm at it!

The ducky and bunny were two little amigurumi toys I finished up yesterday and they turned out sooooo cute!! The ducky wasn't supposed to have a tail but I thought he needed one, so I added it. He *almost* looks like Tweety Bird from Looney Tunes, don't you think?..just a little bit anyway . The bunny is close to one of my favorites so far because of the detailing. It is felt on the inside of the ears (sewn in by hand) and also for the muzzle/nose/mouth on the face. The carrot is from a long time ago when I made it, but thought it'd make a cute photo prop!

Both pattern inspirations are from "Amigurumi World" though I changed them a bit. The bunny's feet, arms and tail (which wasn't part of it either...I don't know why these toys don't get tails!!!) were all my own because I didn't like the suggested ones.


And of course...Tinkerbell cake! This was actually from a few days ago, but I haven't had a chance to post it. A friend's little girl turned 3 and wanted Tinkerbell for her party, so I was in charge of the cake-ness and here it is!! I am pretty pleased with how it turned out. Sometimes doing the "eyes" on cakes gives me a little trouble but I think this was good. :) She absolutely loved it and that is what counts the most. :)

Tuesday, April 5, 2011

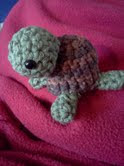
Amigurumi - Turtle Baby, Bumble Bee and Owl Ornament (crochet)


I have been a busy bee (har har..see below) and managed to overdo it today with these little guys. :) Trying to do something new all the time is pretty easy if you crochet and have the world of online inspiration and books galore! This little baby turtle took less than 45 minutes to finish and you can see how small it is in my hand. Very adorable :) The pattern was from the book "Amigurumi Two" by Ana Paula Rimoli. I love her books and directions...very easy to follow and such cute toys.


This bee is also from the same book "Amigurumi Two". There are two bees in the book, actually- a momma and a baby. This one is the baby :) It turned out even a little bigger than I thought, so I imagine the momma bee is quite big.

The owl!! First of all, I may have to keep him. :D I had searched and searched online all over the place..... Etsy, Ravelry, Google, Craftster, Craft Gossip, etc. etc. looking for owl patterns and there was one in particular that kept grabbing my attention and I really wanted to make it, but alas...no funds in the ol' Paypal just at this moment to buy the pattern. So instead, I decided to make my own using my learned-in-the-last-few-months knowledge of how to make these little toys and this is how he turned out. :D Overall it is similar LOOKING to the one I was keeping fresh in my mind, but not the same and she was using different stitch types and no buttons and I have no idea how she did the top, I just sorta winged that. But I am happy with this because not only is it my own design ...but it actually turned out well and I like it. :) Now I just need to make a whole bunch in different colors and find a spot to put them!

Monday, April 4, 2011

Easy Play-Road-Map for kids and their little cars :)

I'm sure I'm not the first person to do/think of this, but there are probably a million different ways you can make these for the kiddos and here is my version I came up with last night. Being Spring Break and all...I wanted to give them something new and fun to do for at least part of it!! We have a huge bucket full of Hotwheels that was just begging for this project.

All you need is a giant piece of felt (I paid $2.50 for a huge piece and brought it home and cut it in half. So what you see in the picture is only half the length I bought and about $1.25 then). And you'll need some fabric puffy paints that come in the little squeeze tubes. Fairly cheap...I had them on hand already. :) Doodle up your town and roads to your heart's desire and ta-da!!! Let it dry at least 4 hours (or overnight).


Here it is the next morning, already being played with. I had also bought a large piece of vinyl for about $2.00 to go over the top so that the car wheels wouldn't snag on the felt. Plus it'll come in handy for play-dough time and such. It isn't sewn on or anything, just laying over the top. :D

Sunday, April 3, 2011

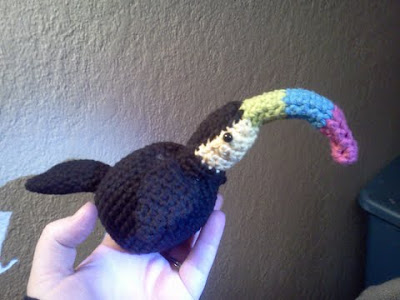
Amigurumi Toucan and Squid (crochet)


Two in one day! I finished this toucan late last night and vowed if I ever make one again, it will be MY way...the pattern was rather interesting to follow. (Do you detect sarcasm? oh good) And it doesn't have feet. Not sure why on that, but none the less it came out cute and I learned a few lessons along the way. By the way, there is a pipe cleaner in the beak instead of stuffing so you can bend it into shape. Never thought of that before and it's a good idea for these toys!


Almost the same story with the squid...the pattern directions didn't "add up" correctly so I kinda had to smash my way through it and figure out what it's supposed to do on my own. The end toy is adorable and I will probably make more in other colors. Here he is sitting on the swing! Who needs an ocean when you live where it rains a lot and have swingsets?! :)

Both patterns from the "Super Super Cute Crochet" book by Brigitte Read. Adorable toys, difficult patterns. :S :S

Friday, April 1, 2011

More Cup Cozies and a Frog Prince (crochet)


Really enjoying making cup cozies (and even managed to get out for coffee today so I could save the cup for photos!). The two on the far right are cupcakes that go around the cup, and the one in the middle is a varigated blue/green yarn with white ruffles at the top and bottom. No pattern for any of them, just making up as I go...

The frog is a cute toy!! The pattern is from "Super Super Cute Crochet" by Brigitte Read. It didn't have the crown, though, so I added that myself and it isn't from a pattern...just kinda winged it. I love the result and it makes the frog look more complete than without! I'd read on Amazon all the reviews about her book and a lot of the reviews complained about mistakes in the patterns...personally, I haven't encountered the problem yet. And I hope that if I do, I'll be able to make the appropriate corrections so the toy will come out right...but the book itself, mistakes in patterns or not, is just beautiful and full of wonderful pictures and inspiration for these toy creations!!! I highly recommend it as something to browse through and enjoy even if you never make the toys. I'll definitely be making more of what is in there myself. :)