 I had a couple of colors of yarn that didn't have a whole lot left on the skein and figured this would be a nice way to use them up. It's not a very long scarf, so I added tassels for about another foot of length. :)

Hello! Welcome to the MaeBelle Creations and Musings blog :) Here we love to cook, bake, crochet, craft and ramble! Follow us for interesting ideas and photos- thanks for stopping by!
Sunday, October 31, 2010
Striped Scarf (crochet)
I had a couple of colors of yarn that didn't have a whole lot left on the skein and figured this would be a nice way to use them up. It's not a very long scarf, so I added tassels for about another foot of length. :)
Coffee Cozy (crochet)
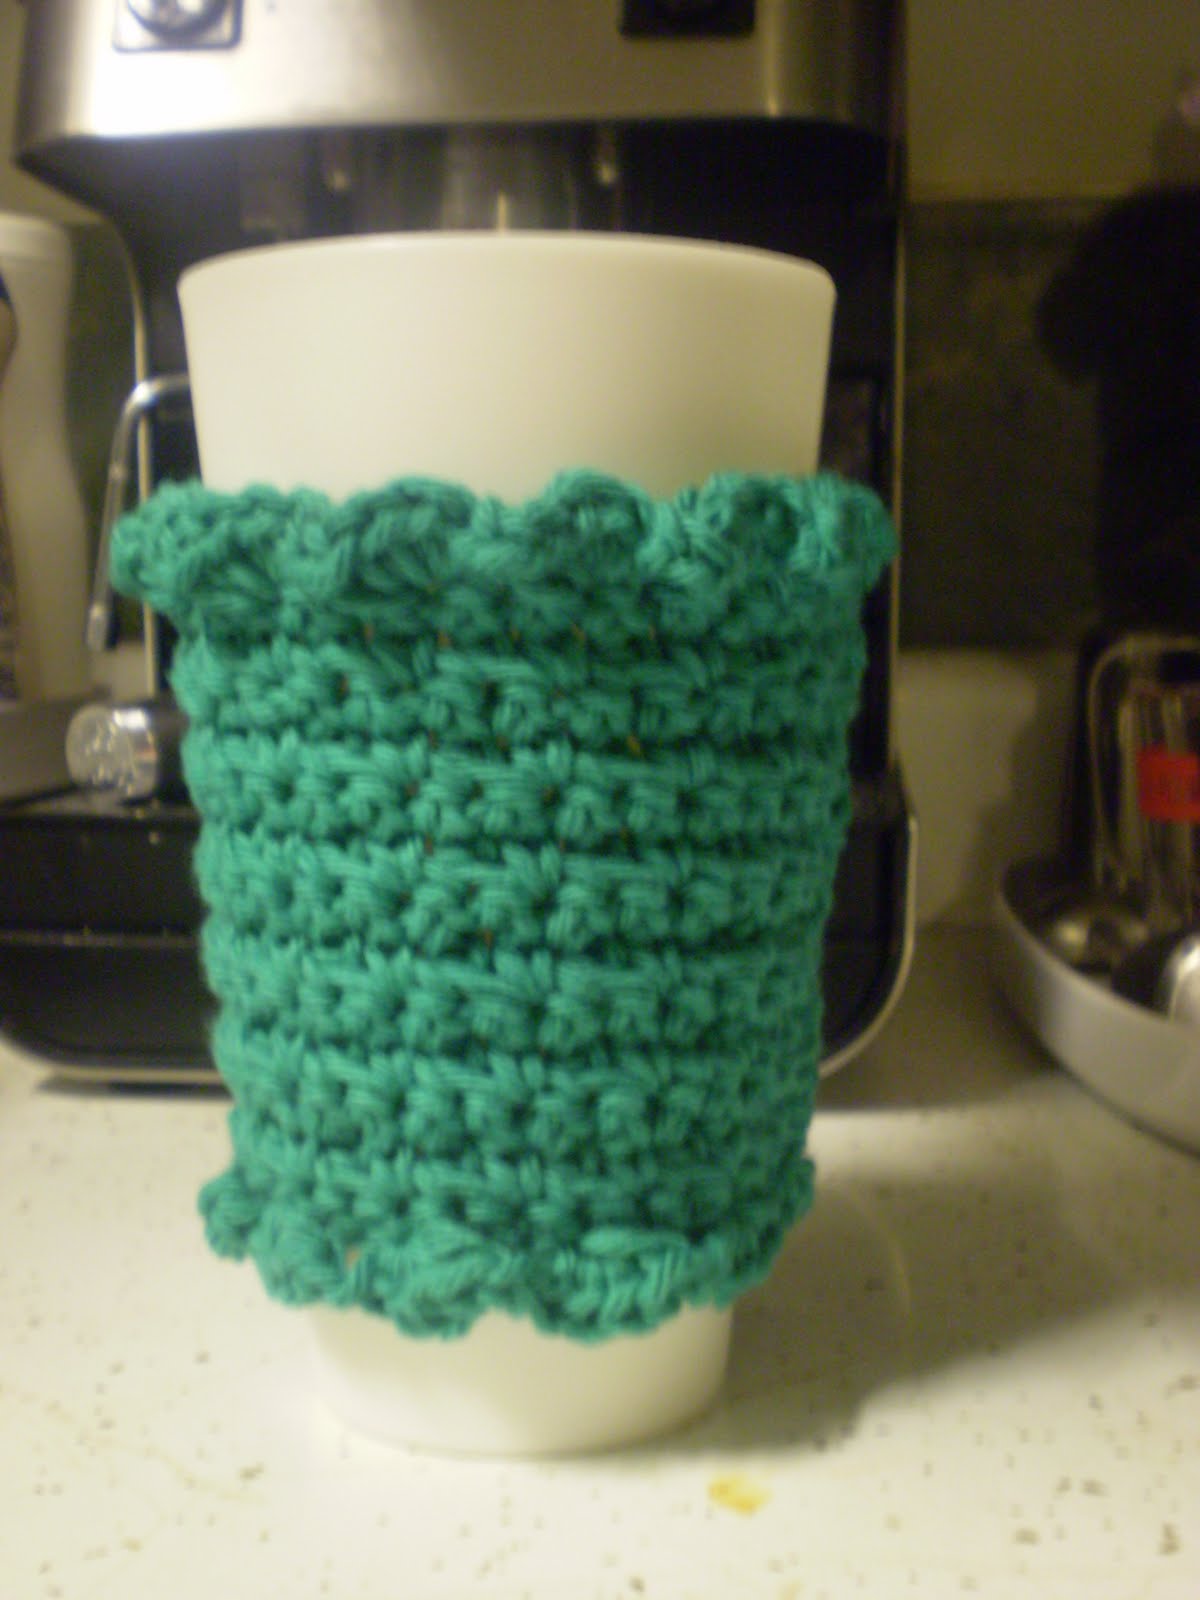
This is a crocheted coffee cozy I did today in all of about 20 minutes. I love how it turned out. I should mention I made one prior using a different pattern and it was awful... unless your coffee cup was as big around as your head. I thought the pattern seemed a little "off" and sure enough it was, so I searched for another one and here is the much better result. :)
Saturday, October 30, 2010
Owl Hat (crochet)


 I am pretty darn excited to post this hat...I even stayed up until 4am to finish it (I know, bad bad bad...) but I had to because it was so much fun and the directions very clear. I used Vanna White yarn (who knew she made yarn?) in "burlap" for a more natural looking color, then just kinda picked through some remnant yarn I had for the other parts since they only needed a little bit. I will try to make more of this hat in other more fancy colors and see how they turn out. :D
Friday, October 29, 2010
Repurposed Halloween Dishtowels-into-Treat Bags


If you're looking for a quick, easy way to make some treat-holder bags for Halloween, here's an idea. I bought 2 halloween-themed dish towels at the local $dollar store and used some sparkly ribbon I had already at home. Simply fold the towel in half (right sides together so that the bag is inside-out during sewing), sew up the sides, and sew the ribbon on each side for handles. Flip it back right-side out for a finished bag. That will give you a "flat" bag... if you wanted to "square" up the bottom 2 corners (like the ones in the photo) to give you a wider bag-bottom, you can do that also: while the bag is inside-out, after sewing up the sides...make a triangle fold out of each corner, and sew perpendicular to the bottom of the bag (the sewn line makes the flat line of the triangle opposite the point of the corner).
I'm not the greatest at explaining things all the time, so if you are confused with my directions (which wouldn't surprise me lol) you can always youtube.com how to square the bottom of a bag for sewing. :)
Cupcake Hat (crochet)

I have always wanted to make one of these and so here is my first attempt. It is a cupcake hat... all crocheted. The way I have it standing up on the counter (without something inside for a head shape) makes it look a little wonky, but it isn't like that when wearing it. :) The finishing touch- cherry red pompom :D The question is.. do I add sprinkles or not?
Wednesday, October 27, 2010
Old Trunk


This was just like opening a giant Christmas present last night. So I have this GIANT old trunk that I've had for a long time...but never had the key for it. I always told the kids not to lock it (which only involved pushing hard enough on the latch for it to "click" in and lock). Well, inevitably, one day my oldest did just that...and it had been locked ever since (5 or 6 years ago) up until last night. :) We drove it down to the local locksmith and for $21.75, he made a key for it. We brought it home, opened it up, and weeeeeeeeee!! Lots of yarn and patterns, materials, crafting supplies, etc...stuff I forgot I had and now I can use again!
By the way, this is a "Neverbreak Trunks, U.S.A." trunk. Old old old...and very sturdy. The inner shelf lifts out with handles so you can access the lower portion of the trunk. If you ever happen across one, I recommend them for storage! Make sure yours has a key ;)
Fishnet-Stitch Crochet Scarf


This scarf whipped up amazingly fast. It is *mostly* a never-ending chain stitch with a connection point every 5 chains. Very light-weight and drapes nicely. I used a soft baby yarn in a minty color and after I finished it, I thought of possibly using this kind of a stitch to make a net for the kids' stuffed animals. :)
Tuesday, October 26, 2010
Crocheted Scarves


Two scarves I made (crochet) over the last few days. Both are from patterns in the "Stitch & Bitch: The Happy Hooker" book which I LOVE. It's easy enough for even me to follow. I borrowed the library's copy but I am thinking I may have to get my own one of these days. :)
Sunday, October 24, 2010
"Who"s there?? An owl!!


Isn't this a beautiful bird?! He/she (?) was in the grass in our backyard this morning and upon closer inspection, we realized that it may possibly be hurt. Based mostly on the fact that it didn't try to fly away or anything when we got closer up to it. So we called Wildlife Rescue and they told us to put it in a box with a towel for some traction, and they came and picked it up. They even said we could call in a few days to check on it if we were curious. :) I'm glad there is such a thing as W.L. rescue for these events. If I'm able to get any updates, I'll post them.
p.s. See the talons on the claw???? Yeah...just put it in a box... right... (I managed) ;)
Saturday, October 23, 2010
Crochet Hooks and Case


Lots of posts today! This should be the last one...I think ;)
A sampling of crochet hooks that have been covered in polymer clay...and a hand-sewn felt case to put them in! I like the extra weight and thickness that the clay gives to the hooks. It makes them less skinny and awkward, so much easier to hold for longer periods of time. :) If you try this, I recommend 'scratching' the hook sizes into the clay before you bake them so you know what you're using!
Polymer Clay Charm and Figurine


Amongst a few little gifts I sent to my SIL for her birthday were these. Handmade pumpkins and a ball of yarn with crochet hook all out of polymer clay. After baking them, they each got a light coating of glaze so they're nice and shiny. :)
Pumpkin Cookies


And now that I know the box containing these cookies have arrived safe and sound to their destination (and I'm not ruining the surprise by posting this) here are the pictures of the most recent cookies I made. Pumpkin cut-out cookies :D They are for my SIL's birthday shindig and the theme is pumpkins! My favorites are the top photo...it almost looks like wood grain the way the icing settled in. :) Have a great party!
Thursday, October 21, 2010
A Work In Progress

This is one full skein of "sugar and cream" 100% cotton yarn...worked into a "corkscrew stitch". I am nowhere near finished with what it will be when completed, but it's a very simple crochet stitch and if I can do it, anyone can. If anyone is interested in a "how-to" just leave a comment. When I get this project finished I'll post a final picture!
Wednesday, October 20, 2010
But of course...more hats!

I'm beginning to think I might be "stuck" in a crafting netherworld where the only thing I can do is make hats...hehehe But I really do like making these and I'm getting better at it, so these are the newest. A Halloween colored one, Christmas colored one, and one that makes me think of Oscar the Grouch even though that's not at all what I was trying to do. :D Eventually these will probably end up on Etsy as soon as I can get some photos of them on a model or head-form of some sort. :)


Tuesday, October 19, 2010
Black Puff Stitch Hat

And in case you wondered what the puff stitch hats look like on...here is a pic!! (not of me :P I'm not lucky enough to have pretty red hair like my sister. Or polka-dotted shower curtains.) hehehe :D
Thursday, October 14, 2010
2 more hats (puff stitch)


This time a red hat and a butter-yellow hat. The red one is going to be the "cherry on top" for the cupcake costume posted a few days ago. Funny thing about these photos...they were both taken in the same spot but the red one had an extra light on. So the yellow one looks more natural, but the red one looks less dark. Photography is fun! :D
For the written pattern and video on how to make these hats, please visit the site linked in the previous post yesterday! :)
Wednesday, October 13, 2010
Puff Stitch Hat

http://crochet-mania.blogspot.com/
The above link goes to the website where I learned how to make this "puff stitch hat". It's all done with crochet and I was able to make it in just under 2 hours. Which, is probably slow for some people...but for me was nearly a miracle because I usually have pattern-phobia and can't follow them and wind up with a disaster. The fact that I was able to follow her instructions (which does include a video and written) shows how well she explained it since I am very visual.
I am completely happy with the result and can't wait to make more! Up until I tried this one, I could only do the most basic of basic crochet stuff..we're talking pot holders and scarves. You know, SQUARE stuff. hahaha :D Happy to say I can move on and do more complicated things! And some day I might even learn to use more than one color! *gasp* :D
Tuesday, October 12, 2010
Cupcake Costume


Tonight I sat down and made this little cupcake costume (thank you and credit for the idea to Lemon Tree Creations website) in just under 2 hours. And the best part about it- NO SEWING required! Just a hot glue gun. :) I can't wait for Halloween!
Star Cookies


Made these star cookies over the weekend...Unfortunately, I forgot to take photos of them while they were still spread out on the trays :( But I got them nicely stacked into the carrier. :)
Sunday, October 10, 2010
Painted Bakers Clay (Halloween)


Last night we made a batch of "bakers clay" and once they were cooled, decided to use acrylic paints to make them all fancy! Each one has a hole in the top so they could have a ribbon put in them to wear like necklaces. Even got the hubster to paint with us (he did the cat!! I was impressed). :) This is an easy, cheap project if you have little ones who are bored.
Bakers Clay
2 cups flour
1/2 cup salt
enough water to make a "play dough"-like consistency.
Mix together and knead until smooth. If necessary, add flour (if it's sticky) or water (if it's dry) but only a little at a time. Roll dough out 1/4 inch thick and cut into shapes using cookie cutters.
Bake at 350* for 20-30 minutes. Allow to cool completely prior to painting.
I suggest in order to avoid puffing up when baking, to place a sheet of parchment paper on top of the raw dough shapes, and then a heavy oven-proof pan (or pizza pan with something on top of it, which is what I did). This is just to help keep them flat while baking. And give it the full 30 minutes if you do this.
Saturday, October 9, 2010
Thin Mints


This recipe is for anyone who would like to try their hand at making knock-off girl scout cookies (Thin Mints). I would recommend when you do the slicing before the baking, make sure to do them fairly thin if you want them to have the "cracker-like" crunch as opposed to a chewy finish. But that's up to you however you like them!
THIN MINTS:
1 1/4 cups flour
1/2 cup unsweetened cocoa powder
1/4 tsp. salt
1/2 cup butter, softened
1 cup sugar
1 egg
1/2 tsp. mint extract (or a tad extra for extra-minty-ness)
3 (1 ounce) squares semisweet chocolate, chopped
1/4 cup butter
1. In a large bowl, beat 1/2 cup butter until creamy. Add the sugar and beat until mixed well. Beat in egg and mint.
2. Sift flour, cocoa and salt together in a bowl. Add to egg mix 1/2 at a time, mixing well after each addition.
3. Divide dough in half. Roll each into logs. Wrap in wax paper, and then in plastic wrap. Freeze for a couple hours until nice and firm.
4. Preheat oven to 350*. While preheating, slice logs 1/8 to 1/4 inch thick and place on cookie sheets lined with parchment paper about 1 1/2 inches apart. Bake 10-12 minutes and cool on wire racks.
5. For the glaze, melt the 1/4 cup butter and chopped chocolate in a microwaveable bowl. Start with 30 seconds and stir...30 more seconds and stir.. continue until thoroughly melted. Drizzle or spoon over cookies and let sit until glaze has set up. Enjoy!
Thursday, October 7, 2010
Halloween Cookies


These little candy corns, ghosts, pumpkins and bats are all sugar-cookies decorated with royal icing. They're currently drying (see top photo) on my space-saving rack that I think I bought from Target online a few years ago and let me tell you..if you have a small kitchen, it is a life-saver.
Tomorrow morning, the other half is taking these cookies to his work because he's been talking up a storm about my baking and decided to go and show them some of what I do. I was fine with that! Any excuse to make cookies is good by me :D
Subscribe to:
Posts (Atom)