Saturday, October 22, 2011

Slouchy Hat (crochet) and Marble Nail Art

One of the hat designs I've seen a lot lately for crocheting are these slouchy hats. They are really roomy and comfortable, so even people with long hair could wear them and keep their hair inside the hat if they chose.

Front view ^^^ Most hats I make start at the top, but for this one you make the band first and work your length from there. I used a variegated mixed-fiber yarn. The pattern is from the Caron yarn company website as a freebie under the title "Urban Jungle". You can go to www.caron.com to look it up if you'd like to try it also.

One difference I made from the pattern was the style of "popcorn" stitch. Their version has you do 9 SC into the spaces for each popcorn and I didn't like how difficult that made it for me to manipulate the hook and work the yarn. So I did mine as DCs instead and only used 5 per. So if you go try their pattern and do it as written, it will probably have a slightly different look, but the same basic idea. :)


Again with the huge photo of nails!!!?? I don't know why it does that. As you can see, I still needed to do a little more "cleaning" up around the edges from where polish got on the skin. But you can see the idea of what I was going for! This is called Water-Marble nail art and happens to be the first time I tried it. Definitely not perfect, but not bad for a first shot. If you'd like to see how it is done, head on over to youtube.com and look up "water marble nail art"...you will see many choices and end results that are very pretty and varied! :)

Wednesday, October 19, 2011

Sparkly Nail Polish Rings and more Nail Art!


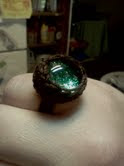
I absolutely love crafts that are easy to do and are inexpensive to try. These 3 rings are all made with cabachons (or flat-backed clear marbles) that I bought in the floral department of the craft store. You simply paint the flat side with a sparkly nail polish of your choice and let it dry. Then glue it to either a ring finding (far right photo) or you can do like I did and crochet a little setting and band with size 10 cotton crochet thread. For those two on the left, I used a dab of hot glue in the inside to push the bottom of the rock onto so it would be sure to stay, even though I did the setting portion pretty tight so it wasn't likely to fall out even without the glue.

If anyone is interested in knowing how I crocheted up the setting and band, please leave a comment.


For this design of 5 different Halloween monsters, I was inspired by a Youtube user by the name of "IHaveACupcake". She makes very clear videos and always manages to make them look easy. ;)


And last but not least...candy corn inspired stripes!! This was my own idea, though I'm sure other people have probably done it. I don't know why the photo is so darn big compared to the others either..??? Oh well :)

Here's how I did them:
*base polish on bare nail first.
*paint whole nail an opaque white color (I used "snow me white" by SinfulColors)
*paint the nail tips a yellow of your choice (I used "the wonder yellows" by WetNWild)
*paint a stripe in the middle with an orange of your choice (I used "9.0.2.1.Orange" by WetNWild)
*finish up by letting the paint dry a couple minutes, then cover with a fast-drying top coat

That's it! :) These WetNWild colors are new, and they all seem to have t.v. show themed names... The orange is great- has a golden sparkle in it and the yellow is more of a pearly color. I recommend them. :)

Sunday, October 16, 2011

Nail Art - Aliens, Frankenstein, Cherries and Angry Bird!


Good weekend to everyone!! Today's post is a quick one...I do have a lot of other stuff in the works right now, but not very much "extra" time for getting it photographed and such today. So I thought I'd share some nail art instead. :) From top to bottom we have Aliens, Cherries, Angry Bird, and Frankenstein.

Most of my inspiration actually comes from some wonderful nail artists on youtube. There are a TON of how-to videos and ideas so I just pick and choose which ones I think may actually be doable for me. I'm not much of an artist when it comes to drawing, so this is good practice. :)

Some of them use acrylic paint to draw on the designs over a base of nail polish... and some just use all nail polish in various colors, which is what I typically do also. There are a bunch of great ideas for Halloween if you're looking for a fun design, go check out youtube "nail art Halloween". :)

Friday, October 14, 2011

2 Capes, a Gnome, and a Candy Necklace!


Good evening!! We had a moment of sunshine today (shock!) so I took advantage of it to get a couple of photos of these two capes I finished up this week. The red one is going to be part of a Little Red Riding Hood costume for Halloween. The multi-color one (Red Heart's "peruvian print") is for one of my niece's Christmas gift. Figured I better start now so I have time to make all this stuff!! :)

I love the pom-pom tie for the red one, but it was suggested in the pattern for use with kids over 3 and the button-tab option for kids 3 and under, so that is why they have different closings. I have to apologize I don't have the name of the book the pattern was from...I checked it out at the library already had to turn it back in. (Forgot to write down what it was). I did end up making several changes along the way, but for the most part the pattern was easy to follow.


A new gnome was created, too...this guy has a nice curly beard and is sticking out his tongue to get at his lollipop he's holding. If only he could reach!!! :D


With the left-over clay from making the gnome's lollipop, I rolled out some super thin "snakes" and cut them into candy sticks. :D Like yesterday's post with the micro mini gnome in a necklace...these are the same kind of bottles. Approx. 1 1/2 inches tall and a cork glued in..whole thing strung on a ball chain necklace. The little candies are pink, white and purple shades all swirled together... I love how bright it is. :)

Thursday, October 13, 2011

Teeny Tiny Micro Gnome (polymer clay)


Does anyone remember Ice-Cream Gnome? There he is on the right...and if you look closely, you will see the super-duper tiny gnome to his left. Sitting on top of a toothpick! That was his pre-baked phase...and up close after baking to the far right.


This bottle is only about 1 1/2 inches high. There is dried moss in the bottom for him to sit in. :)


Very close-up shot- I think he looks cozy! :D In making this guy, I used polymer clay and some findings (the necklace, bottle, moss, etc..) to put it all together for a necklace. The cork is glued in so he will not be leaving the bottle any time soon. Also his feet are glued to the bottom anyway, so he'd really have to try hard to make a break for it. ;)

Thanks for viewing and let me know what you think of him!! :D

Sunday, October 9, 2011

Snowmen, Zombies and Granny Square Gloves (clay & crochet)

Had some fun with polymer clay a few days ago and not sure why (maybe the fact that we had to turn on the heat for the first time this Fall??) but I decided to make snowmen!! These two poor snowmen are sitting on a snowy hill roughly the size of a fifty cent piece. One fell over and the other is sad over it :( :(

SUPER-miniature snowman in a bottle, which is approximately 1 1/2" tall. It is hanging on a necklace and all sealed up so he can't escape! :)

Granny square fingerless mittens I made up using brown, cream, and fushia pink... I love the color combo!

And finally something a little more in-tune to the current time... a ZOMBIE!!! He is a custom order for a special person and hopefully they either don't see this post or already have the zombie hehehe....it's a surprise ;) I had to sew on a heart button to make him less creepy and 100% adorable, too. :)

All of the other items are available...if interested before I get them listed on Etsy, drop a line! :) (other than the zombie! sorry :P )

Saturday, October 8, 2011

Amigurumi Peanut Butter & Jelly (+ g.i.t.d. and plaid nails!!)


If you're looking for a great polish for Halloween this year, I'd like to recommend O.P.I.'s "zom-body to love"... it is a glow-in-the-dark green color (see above left) and it REALLY glows quite bright! Design on the right is done with a random assortment of polish brands and colors into a simple plaid design. Use purple, orange, black and white for Halloween!! :)


4 pieces ... bread slice, peanut butter, grape jelly, bread slice....

...put all together into a peanut butter and jelly sandwich!! Fun toy for kids :D This pattern is from the "Tasty Crochet" book if you're interested in checking it out. :)

I have lots more to share over the next several days (still catching up from the non-internet stretch). Stay tuned! :)

Monday, October 3, 2011

Birdie, Tree Stump, Cupcakes, Strawberries! (crochet and nail art)

A couple other nail art designs seen around here recently...cupcakes on the left and strawberries on the right. :)

This cute little set is actually two toys. The red bird is just sitting on top of the tree stump, but not attached. The pattern is from the "Amigurumi Toy Box" pattern book. I love that book and have made *almost* everything in it...still a few more to do. I highly recommend it to anyone who loves to crochet little toys!!

Saturday, October 1, 2011

Amigurumi snowmen, long elf-ish hats, and tiny stockings! (crochet)


Is anyone else glad that it is finally Fall and Summer is over? I don't know why, but this has always been my favorite time of the year. Maybe someday if I get into a house big enough to have a garden, I'll be more outdoorsy and like the Summer. But for now, I am enjoying being able to turn on the oven to bake cookies and pies without heating up the house too much!

Another thing I love about this time of year is making hats!! Somehow the lighting is off a bit in the photo, but it is supposed to be green and yellow stripes with white in there. It hangs really low, about down to the top of your pants pockets with a huge pom-pom. I can do these in any color combo, but chose these for this one. I've got similar ones listed in my Etsy shop if you're interested, of if you do want specific colors- drop me a line!


Mr. and Mrs. Snowman all bundled up! These were something I just made up while I was watching a (rather boring) movie last week. I've decided they have to go as a pair because I wouldn't want them to be lonely. :) They're not listed yet, but hopefully soon...


And finally a miniature stocking. These are perfect for throwing small stuff in, or even holding a gift card. The pattern for this is from "The Big Book of Holiday Crochet" by Annie's Attic. I found it pretty easy to follow and there were other color varieties in there as well, so you're not stuck with just the traditional red/white look if you wanted something else. :)